

Workflows
Estimated reading time: less than 1 minuteWorkflows provide access to workflow execution results and verification details.
Each workflow processes user data through a sequence of verification steps (e.g. identity, age check, document validation) and produces a structured output that can be consumed by your system.
🎯 Introduction
This section covers how workflows are structured, how to interpret their outputs, and how to retrieve results for integration into your system.
⚙️ Workflow Overview
After you complete the onboarding survey (business type, verification needs, expected volume, etc.), the Workflows page opens with a "Recommended for your setup" section – up to three templates that best match your answers.
Unlike before, the workflow list itself starts empty. There is no default workflow anymore – every workflow you see in the list is one you (or your team) explicitly created and published.
Starting from a recommended template
Click "Use this" on any recommended card. This takes you straight into the workflow canvas with that template pre-filled, so you can review and adjust every step to match your needs.
The workflow only appears in your Workflows list once you click Publish Changes on the canvas. Until then, it's just a draft you're editing – nothing is created or activated yet.
Creating a new workflow
Click "+ Create Workflow" to open the Choose a workflow modal:
From here you can either:
🤖 Build a workflow with AI
New feature: instead of dragging nodes manually, you can describe the verification flow you want in plain language and let the assistant build it for you.
Click "Build With AI" in the canvas toolbar to open the panel:
Try prompts like:
- "Create an eKYC workflow with ID document scan and liveness check"
- "Verify the user is over 21 and email me the results"
- "Add a watchlist screening after the personal info step"
If something is missing (a destination email, a webhook URL, a minimum age, etc.), the assistant asks a follow-up question before building. Once it has enough information, it applies the workflow directly to the canvas:
You can keep chatting to refine it further (e.g. "send the data to my backend via HTTP webhook instead"), then click Publish when you're happy with the result, or Not Now to keep editing manually.
Here is the demo how to use the AI builder:
Import / Export as JSON
Every workflow can be exported to a JSON file and imported again later – useful for backing up a configuration, moving it between Sandbox and Production, or sharing it with another teammate or organization.
Custom banner & message for your end users
Click the gear (⚙) icon next to the workflow name to configure a custom banner or message shown to your end users during the data-sharing flow – one message before they start sharing (e.g. explaining what will be requested and why) and one after they finish (e.g. a thank-you or next-steps note).
Once published, workflows show up in your list with their live status:
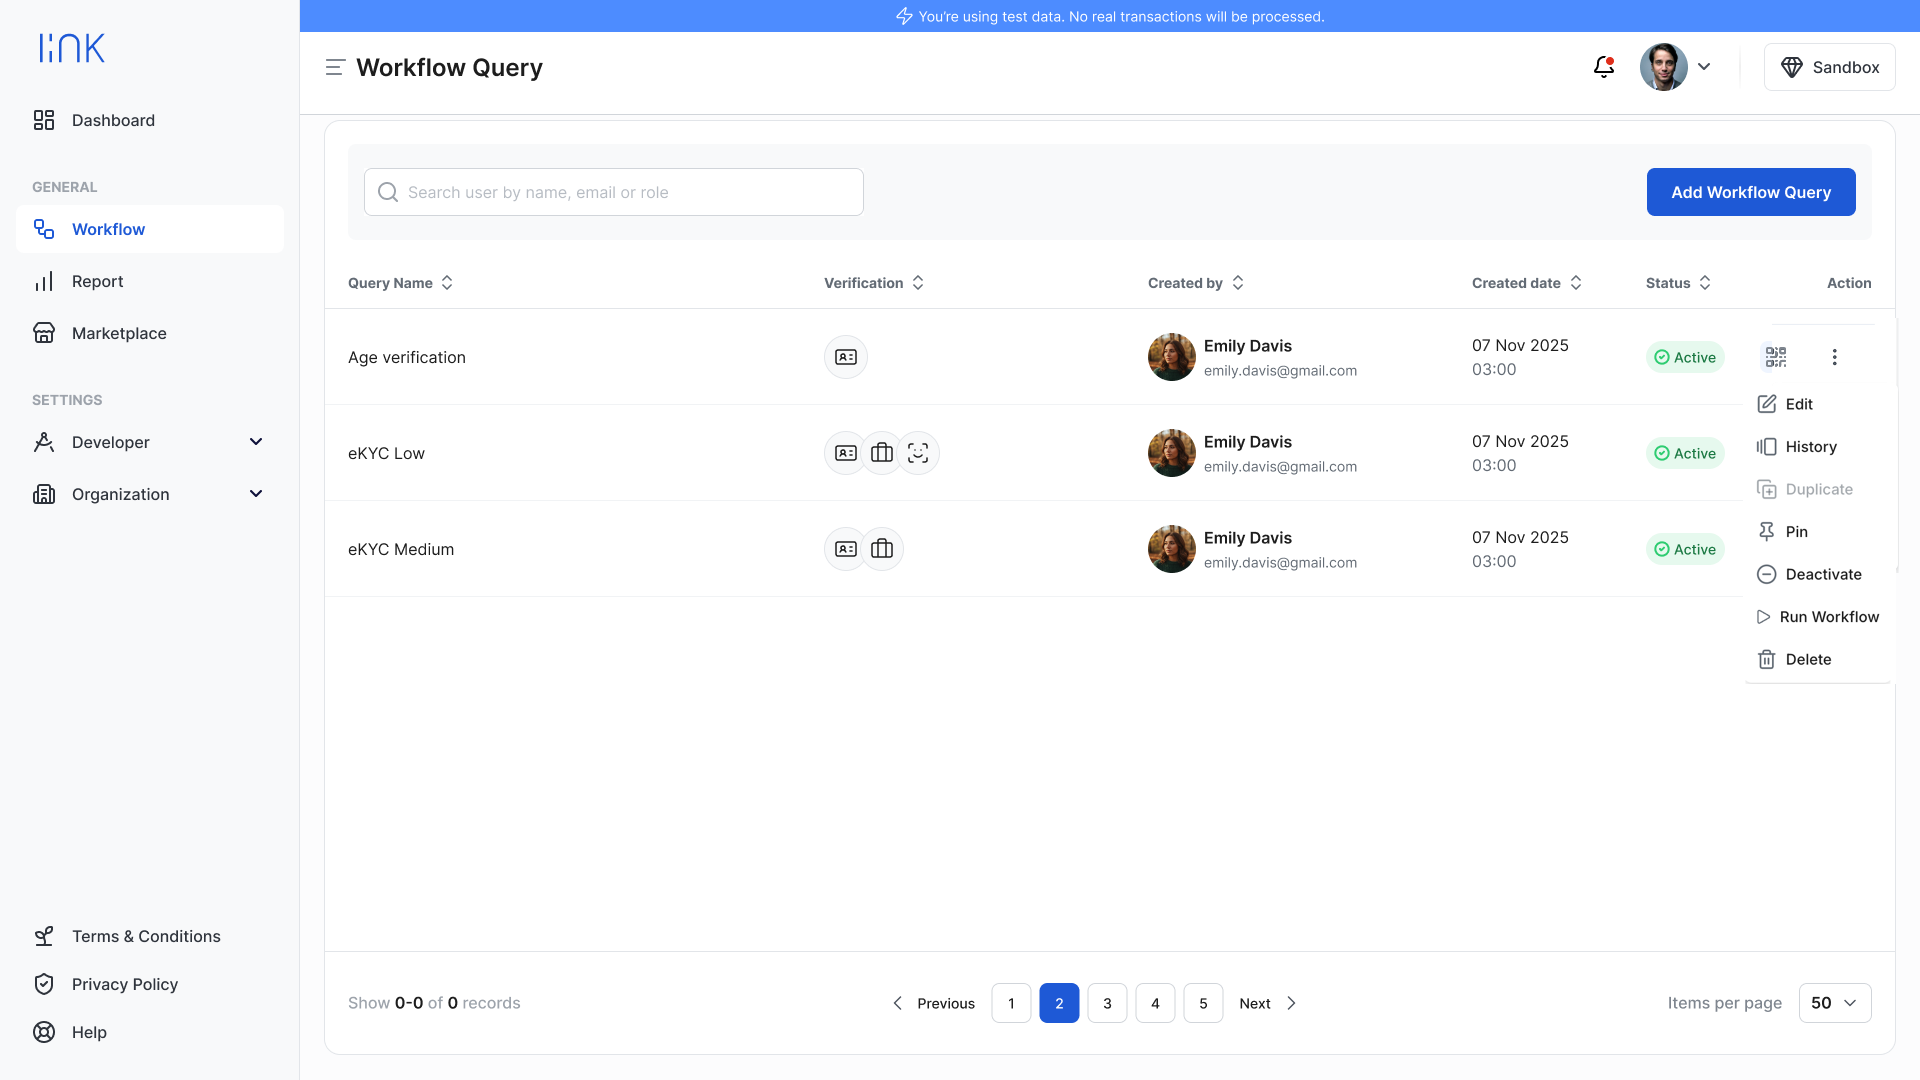
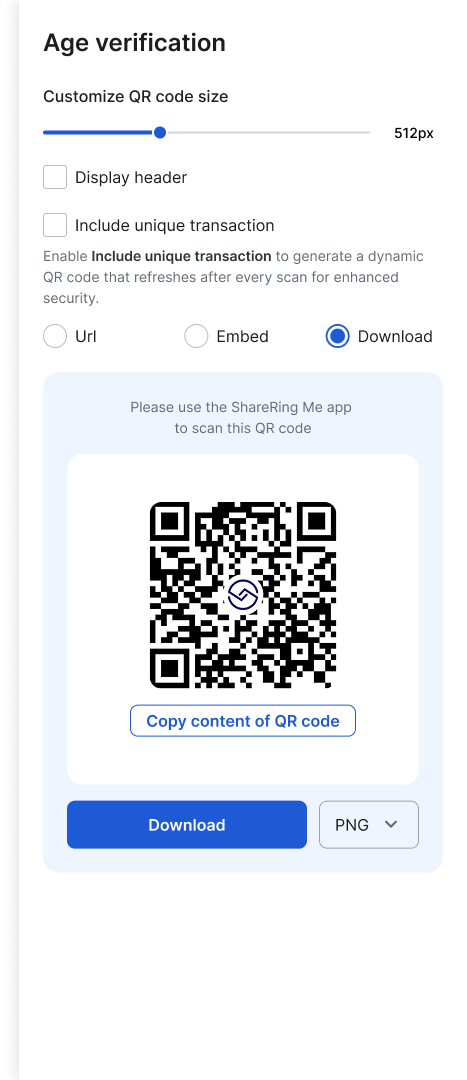
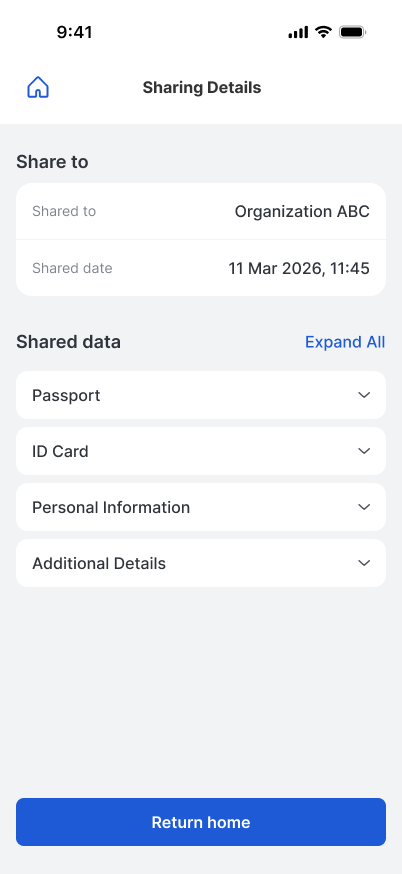
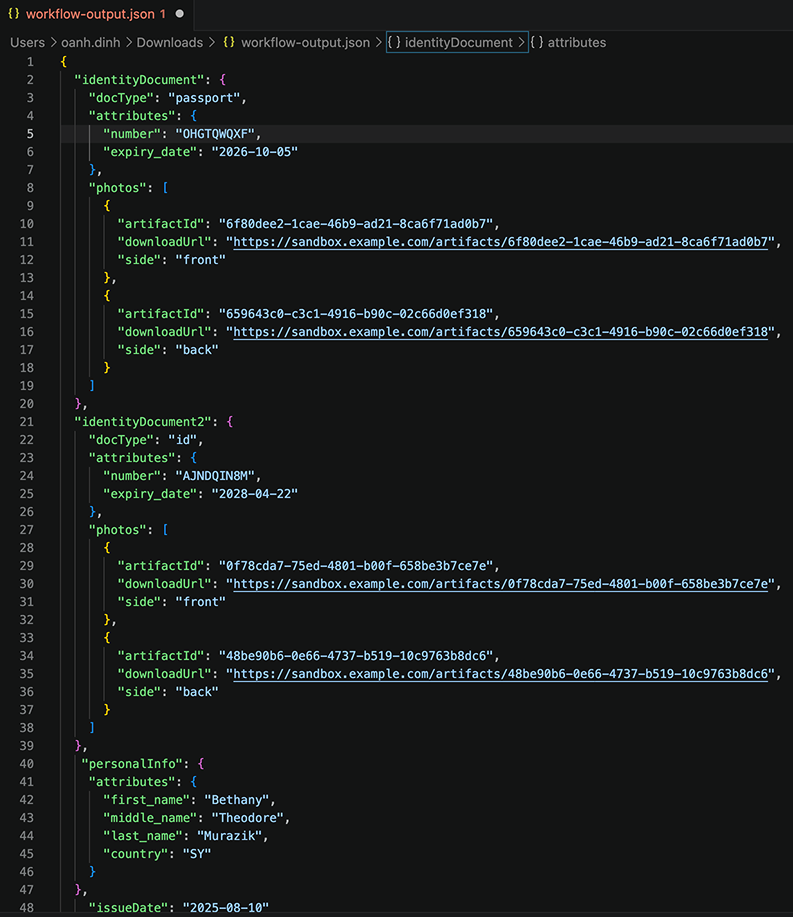
End-to-end sharing flow
Once a workflow is published, the way your end users interact with it – and the way you receive their data – hasn't changed:
🔧 Workflow Actions
Each workflow row includes an action menu with the following options:
The editor supports drag-and-drop workflow design with configurable nodes such as capture, verification, logic, and delivery.
🧩 Pre-built Workflow Templates
Why This Matters
Pre-built workflow templates enable you to quickly set up and test verification flows without building from scratch.
They allow you to:
- Launch verification flows in minutes
- Test end-to-end scenarios via QR code
- Receive structured results via HTTP (webhook), email, or Google Drive
- Understand how verification steps, logic, and outputs are connected
These templates also serve as a foundation for further customization based on your business requirements. Clicking "Learn more" on any template card in the web app takes you directly to its section below.
There are currently 9 pre-built templates:
1. Age Verification
Explanation: Automatically block users who don't meet your minimum age requirement. Simple, fast, and configurable to any age threshold.
- Age verification: configurable minimum age (e.g.
Age ≥ 18)
2. eKYC Basic
Explanation: Verify government-issued IDs – including passports, national ID cards, and driver's licenses – with automated checks across 193+ countries. Best for low-friction onboarding where speed matters.
- Identity document: Government IDs
- Personal Information: First Name, Last Name, Email (required)
3. eKYC Basic + Address
Explanation: Verify government IDs and confirm where your users live with proof of address. Ideal when location verification is required alongside identity.
- Identity document: Government IDs
- Personal Information: First Name, Last Name, Email, Address
- Other Identification Documents: Proof of Address
4. eKYC + Selfie
Explanation: Verify a government ID and confirm it belongs to the right person with a selfie liveness check. Reduces fraud while keeping the user experience smooth.
- Identity document: Government IDs
- Personal Information: First Name, Last Name, Email
- Require a liveness check
5. eKYC + Age Verification (legacy eKYC Low)
Explanation: Verify identity with a government ID and selfie, and automatically decline anyone under 18. The go-to workflow for platforms with age restrictions.
- Identity document: number, photo, expiry date (Passport or Driving Licence)
- Personal Information: Full name, Date of birth, Age, Country
- Age Verification:
Age ≥ 18 - Add-ons: PEP check
6. eKYC + PEP + AML + Selfie
Explanation: Full compliance check: verify identity with ID and selfie, then screen users against global AML and PEP watchlists. Built for regulated financial services.
- Identity document: Government ID
- Personal Information: First Name, Last Name, Email, Address
- Add-ons:
- AML check
- PEP check
- Require a liveness check
7. eKYC + Age Verification + Address + Watchlists (eKYC Medium)
Explanation: The most comprehensive KYC flow: identity, age gate, proof of address, and global watchlist screening. Designed for financial platforms with strict compliance requirements.
- 1st Identity document: Passport – number, photo, expiry date
- 2nd Identity document: ID or Driving Licence – number, photo, expiry date
- Age Verification:
Age ≥ 18 - Other Identification Documents: Proof of Address – issue date, photo, within 3 months
- Add-ons: PEP check
8. eKYC Exchange + Watchlists + Selfie
Explanation: Built for crypto exchanges: verify identity with NFC passport and secondary ID, selfie liveness check, and screen users against AML, sanctions, and crypto-specific watchlists.
- 1st Identity document – Passport NFC
- 2nd Identity document – ID or Driving Licence
- Age verification: exact value ~ Date of Birth
- Personal Information: First name, Last name, Email, Nationality, Gender, Address
- Custom value questions, e.g.:
- What is your contact address in Thailand?
- What is your occupation?
- What is your company name?
- What is your company address?
- Add-ons:
- AML check
- Sanctions check
- Require a liveness check of users before they share information
9. eKYC + Mobile 2FA + Selfie
Explanation: Verify identity with a government ID and selfie, then confirm the user owns their phone number via SMS OTP. Adds an extra layer of trust for onboarding flows.
- Identity document: Government ID
- Personal Information: Email address, Phone number (verified), Country, First name, Last name, Photo, Nationality, Place of birth, Gender, Address
- Require a liveness check
This template is coming soon
Sample walkthrough – Age Verification workflow
This workflow validates whether a user meets a minimum age requirement.
To receive verification results via HTTP (webhook), configure the delivery step:
- Open the Age Verification workflow (from a template or your published list) and click Edit
- Open the Workflow Editor
- Select the Delivery HTTP component
- Enter your webhook URL – this is where results will be sent
Once configured:
- A conditional check evaluates the result
- If passed → data is delivered to your webhook endpoint
- If failed → the workflow is rejected
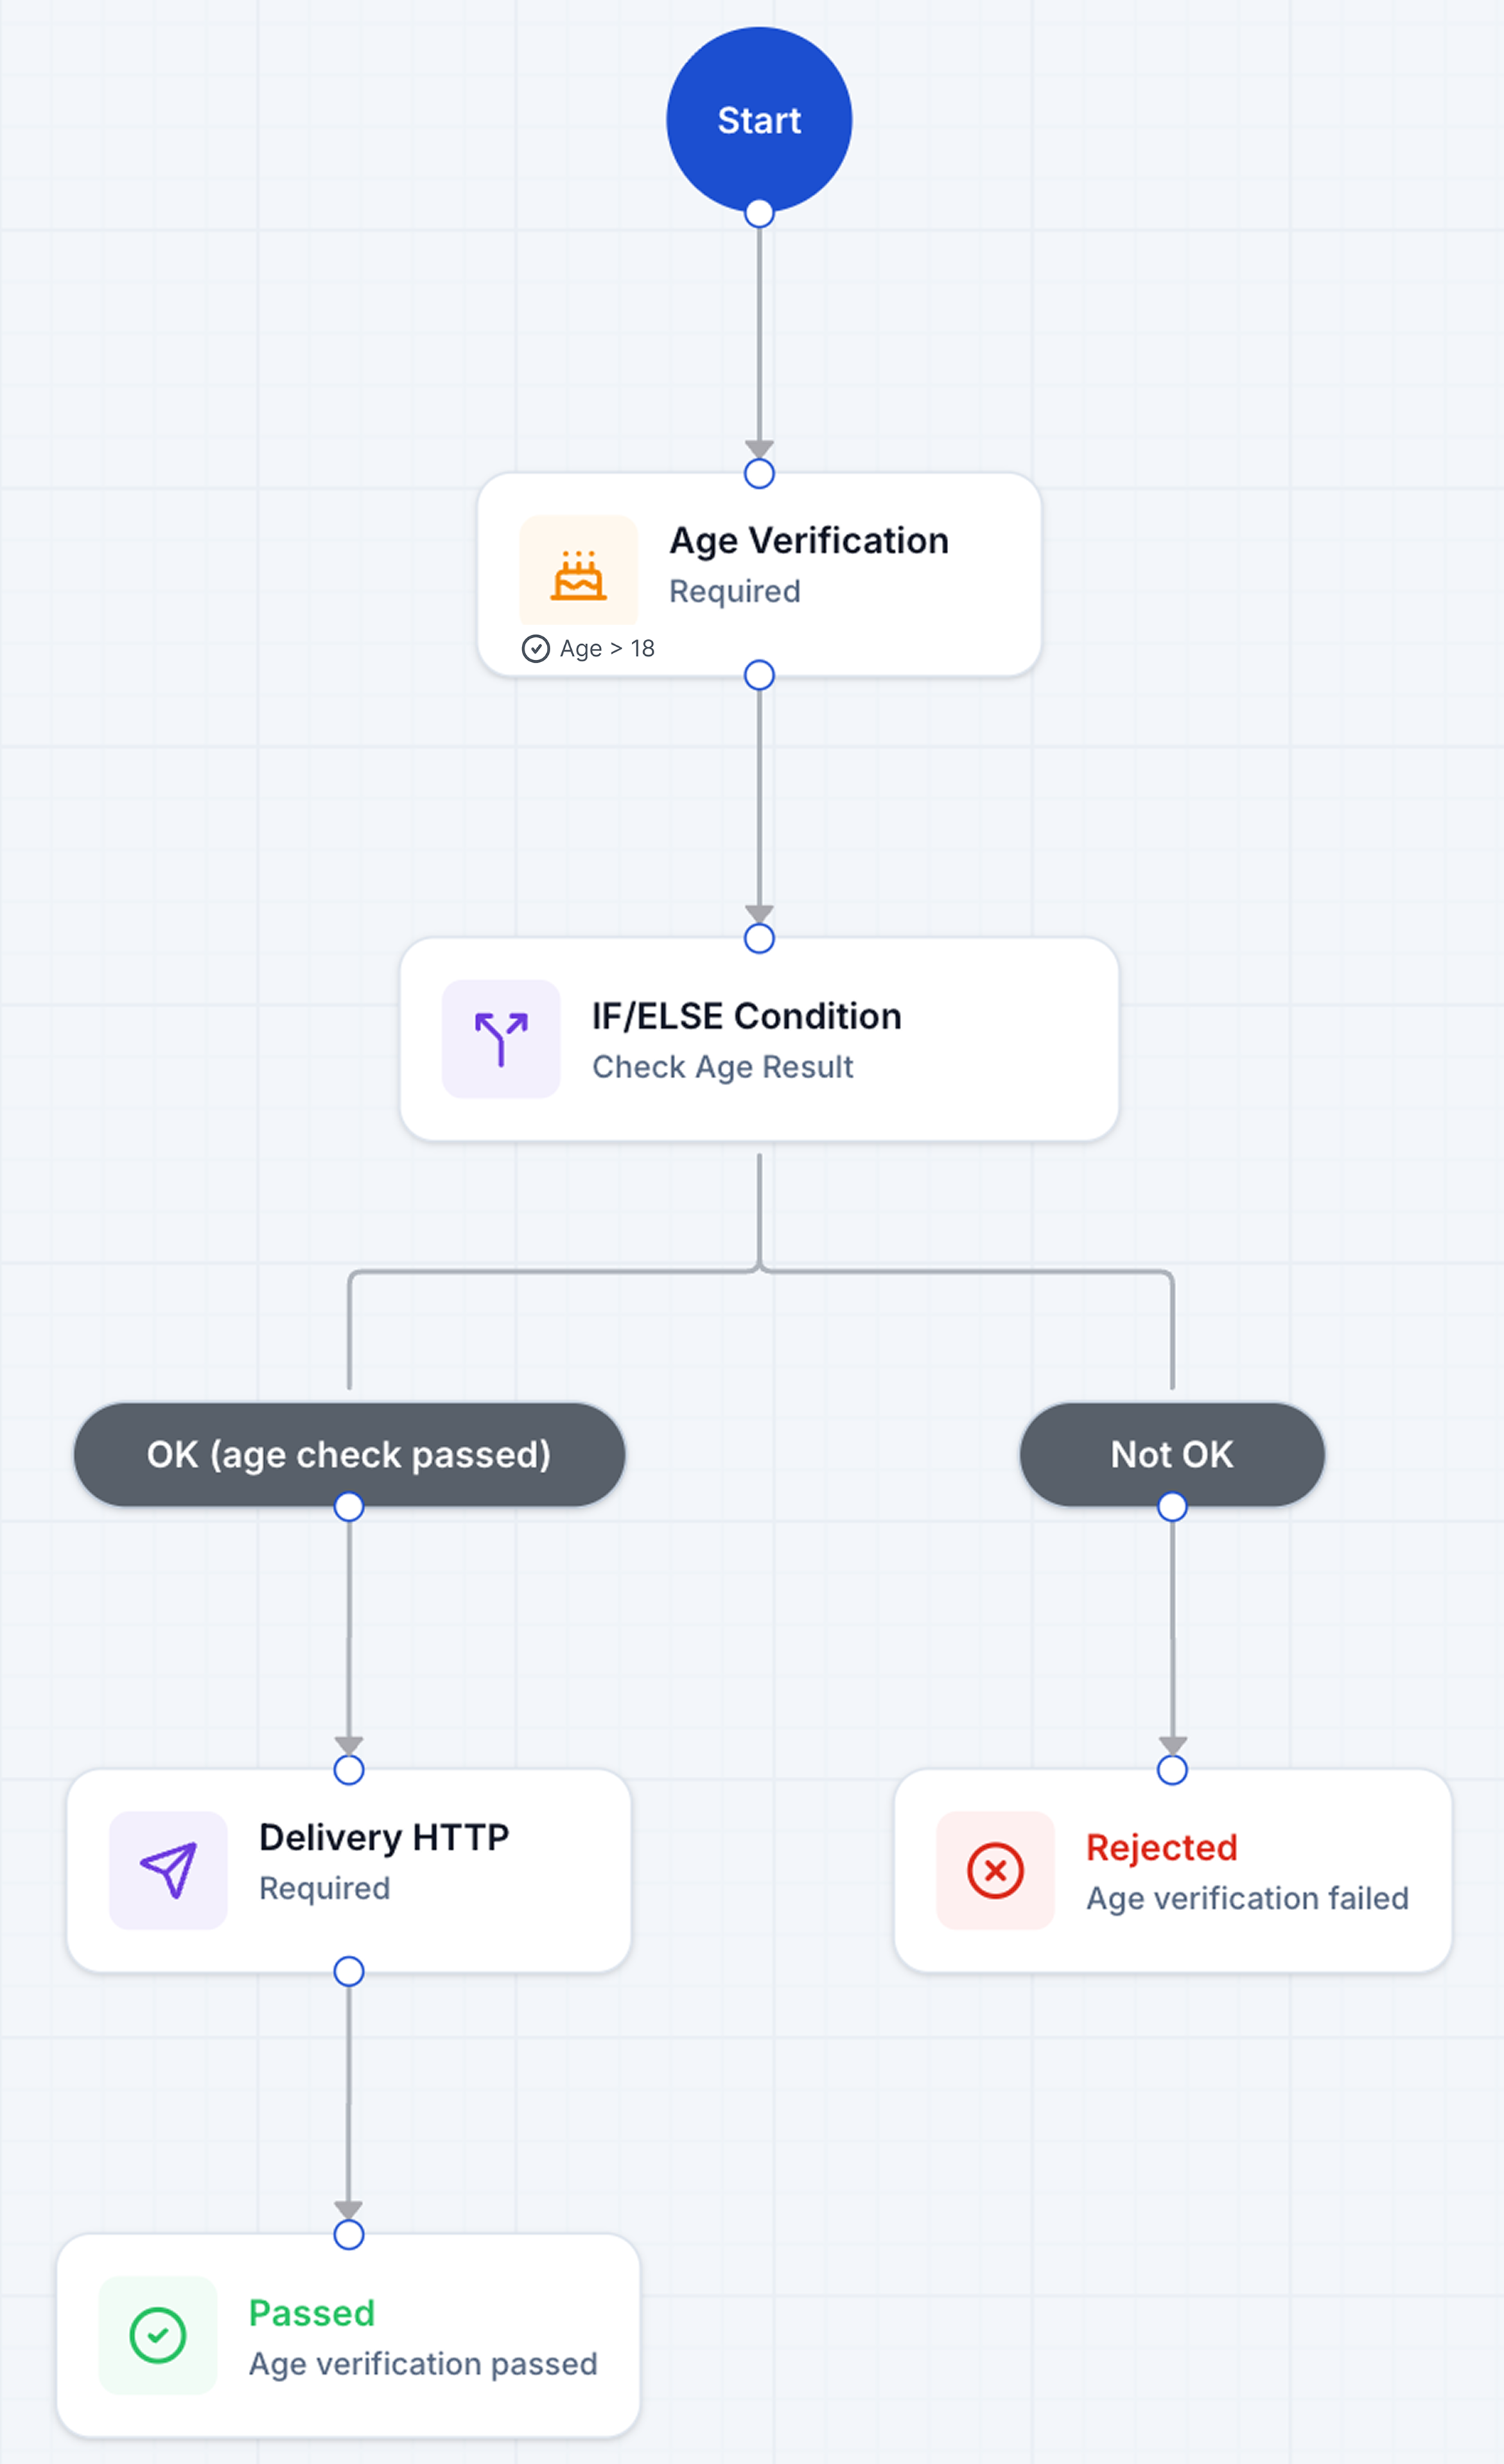
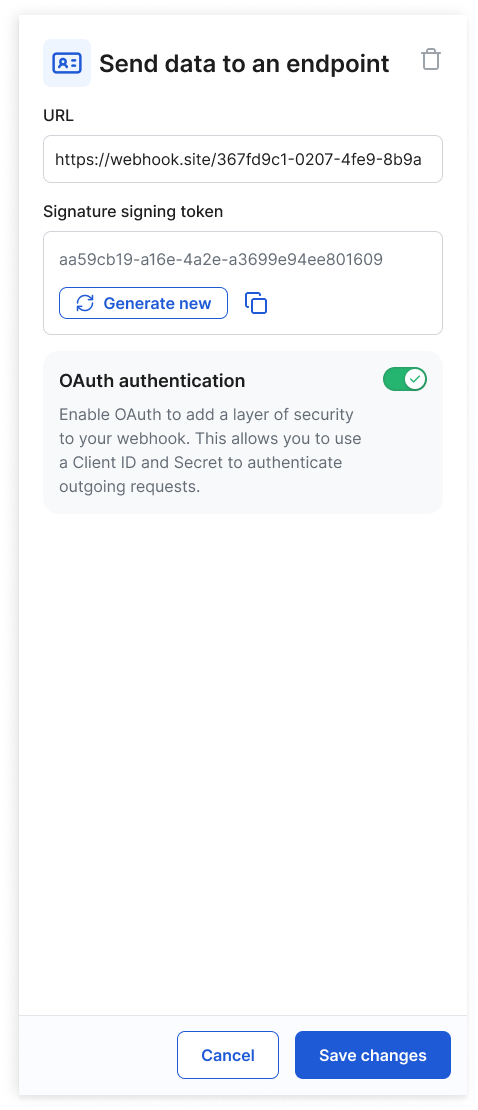
Click the Delivery HTTP node to configure your endpoint for receiving verification results.
For a complete end-to-end walkthrough, including QR code scanning, refer to the demo video.
📡 Querying Workflow Results
Verification results can be delivered wherever fits your integration best:
A typical API response includes:
- Workflow status (passed / failed)
- Step-level outputs
- Metadata (timestamps, inputs, verification results)
These results can be used to:
- Drive business decisions
- Trigger downstream processes
- Store verification records