ShareRing Link
ShareRing Link is the mechanism for establishing a private communication channel to exchange encrypted data between businesses and their customers for the purposes of verifying the customer's identity.
With ShareRing Link you can create queries to verify different aspects of your customer's identity. For instance:
- What is the customer's name?
- Is the customer over 18?
- Is the customer from a specific country?
The queries you create are represented in a QR code that your customers scan with the ShareRing Me or ShareRing Pro apps. After scanning the QR code, they are presented with the information that is being requested and can approve sharing the information.
ShareRing Link Dashboard
The ShareRing Link Dashboard is where you manage your ShareRing Link queries and account.
Login to the ShareRing Link Dashboard
- In a browser, open the ShareRing Link dashboard: https://sharering.link/user/login.
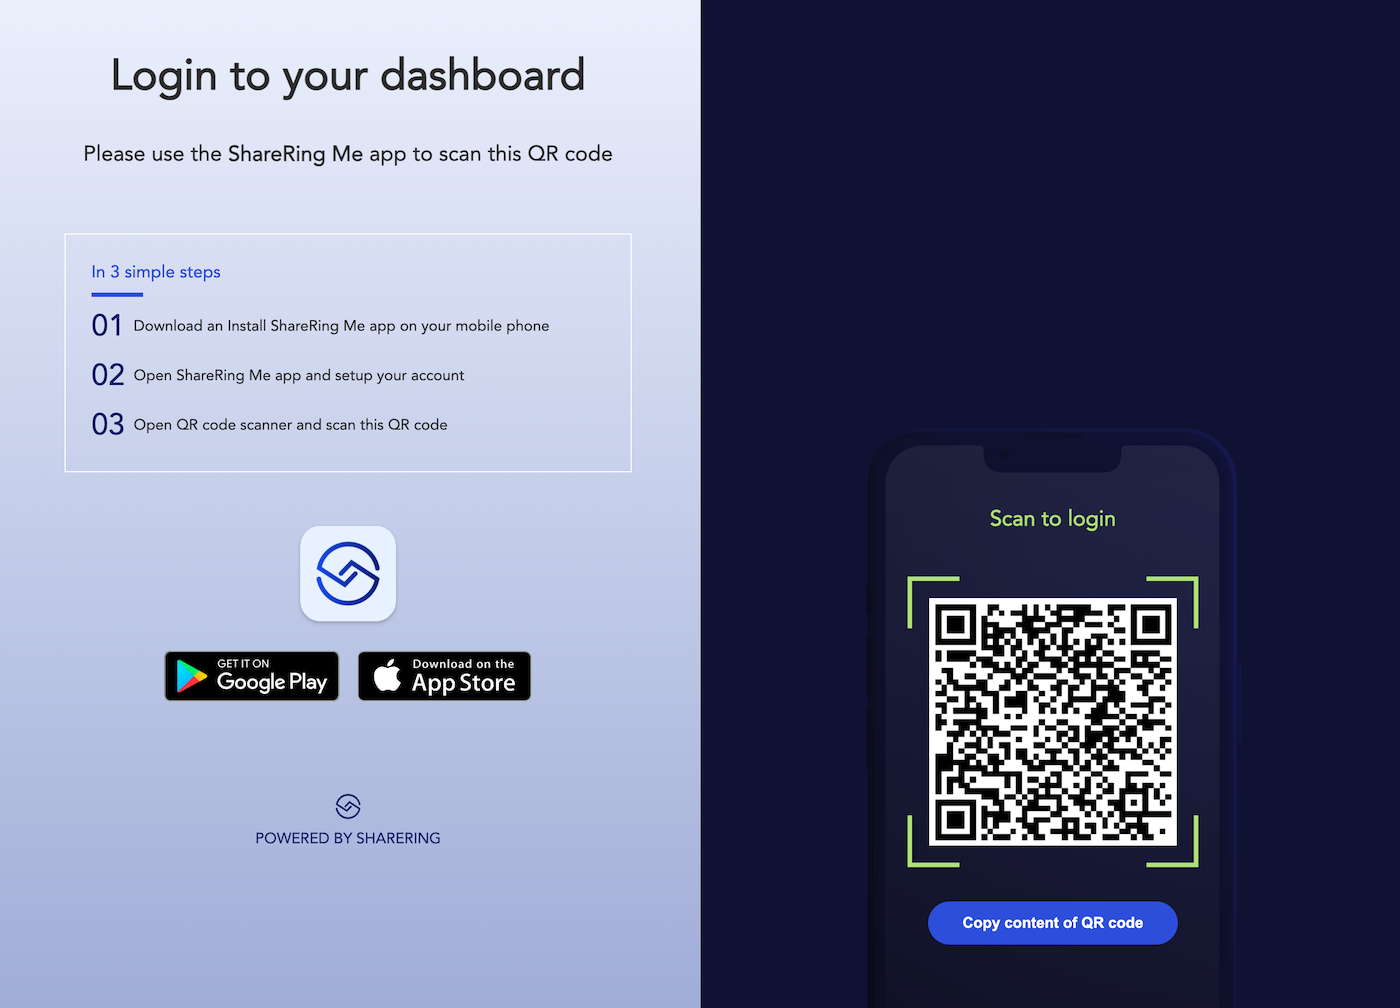
- Open the ShareRing Me app, and setup your account.
- With the ShareRing Me app scanner on your phone, scan the QR code in the browser.
- In the browser, you will now be logged into the ShareRing Link dashboard.
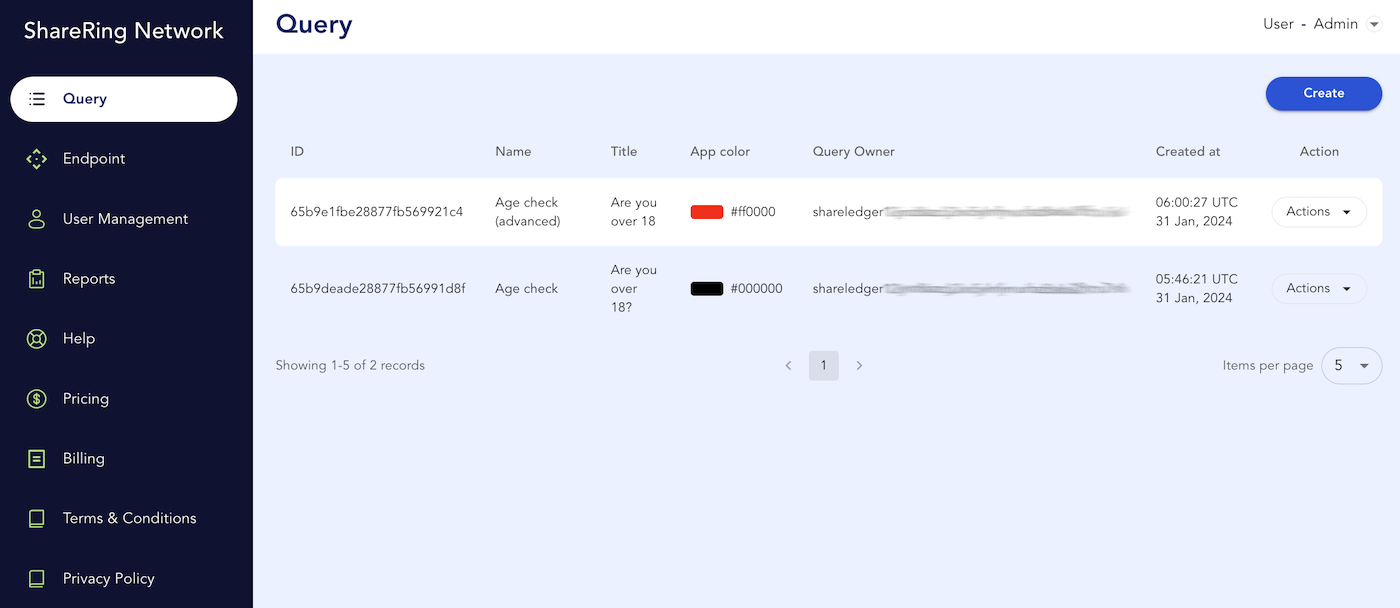
Query
The query tab is where you define and manage your queries.
Basic and Advanced mode
ShareRing Link comes with two modes. Basic and Advanced.
Basic mode is available on free and paid accounts, and is used to query predefined values from user's vaults. Free accounts can only query user added values from user's vaults.
Advanced mode is available on paid accounts. With advanced mode you can write your own queries in JavaScript and query all types of values from user's vaults at all verification levels.
Basic Mode Query
To create a query in basic mode, click the Create button from the Query page and then enter the details for your query.
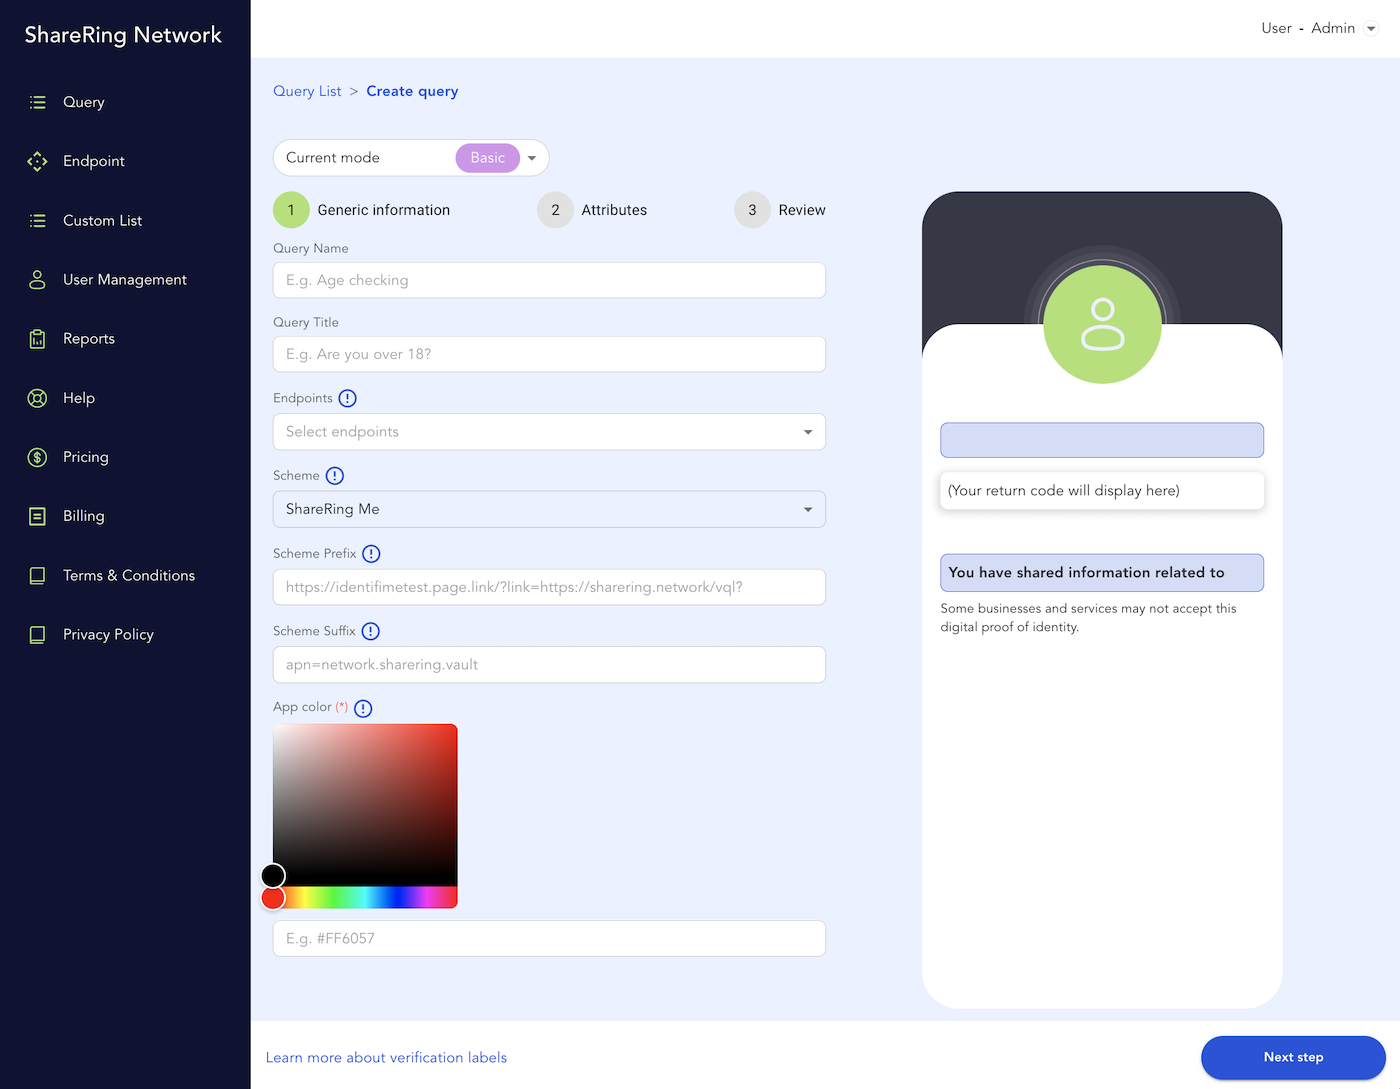
- Query Name: Add a name that you can use to identify this query. For example,
Age check. - Query Title: Enter the query you will ask the customer. For example:
Are you over 18? - Endpoint: Add the endpoint where you want the query results to be sent. See Endpoints to define your endpoint.
- From Scheme, select the default app you want your query to be supported with. Your selection will auto-populate the Scheme Prefix and Scheme Suffix, depending on your selection, which are required to open the correct app when a user scans your QR code.
- Select the color you would like to display in the app when the QR code is scanned.
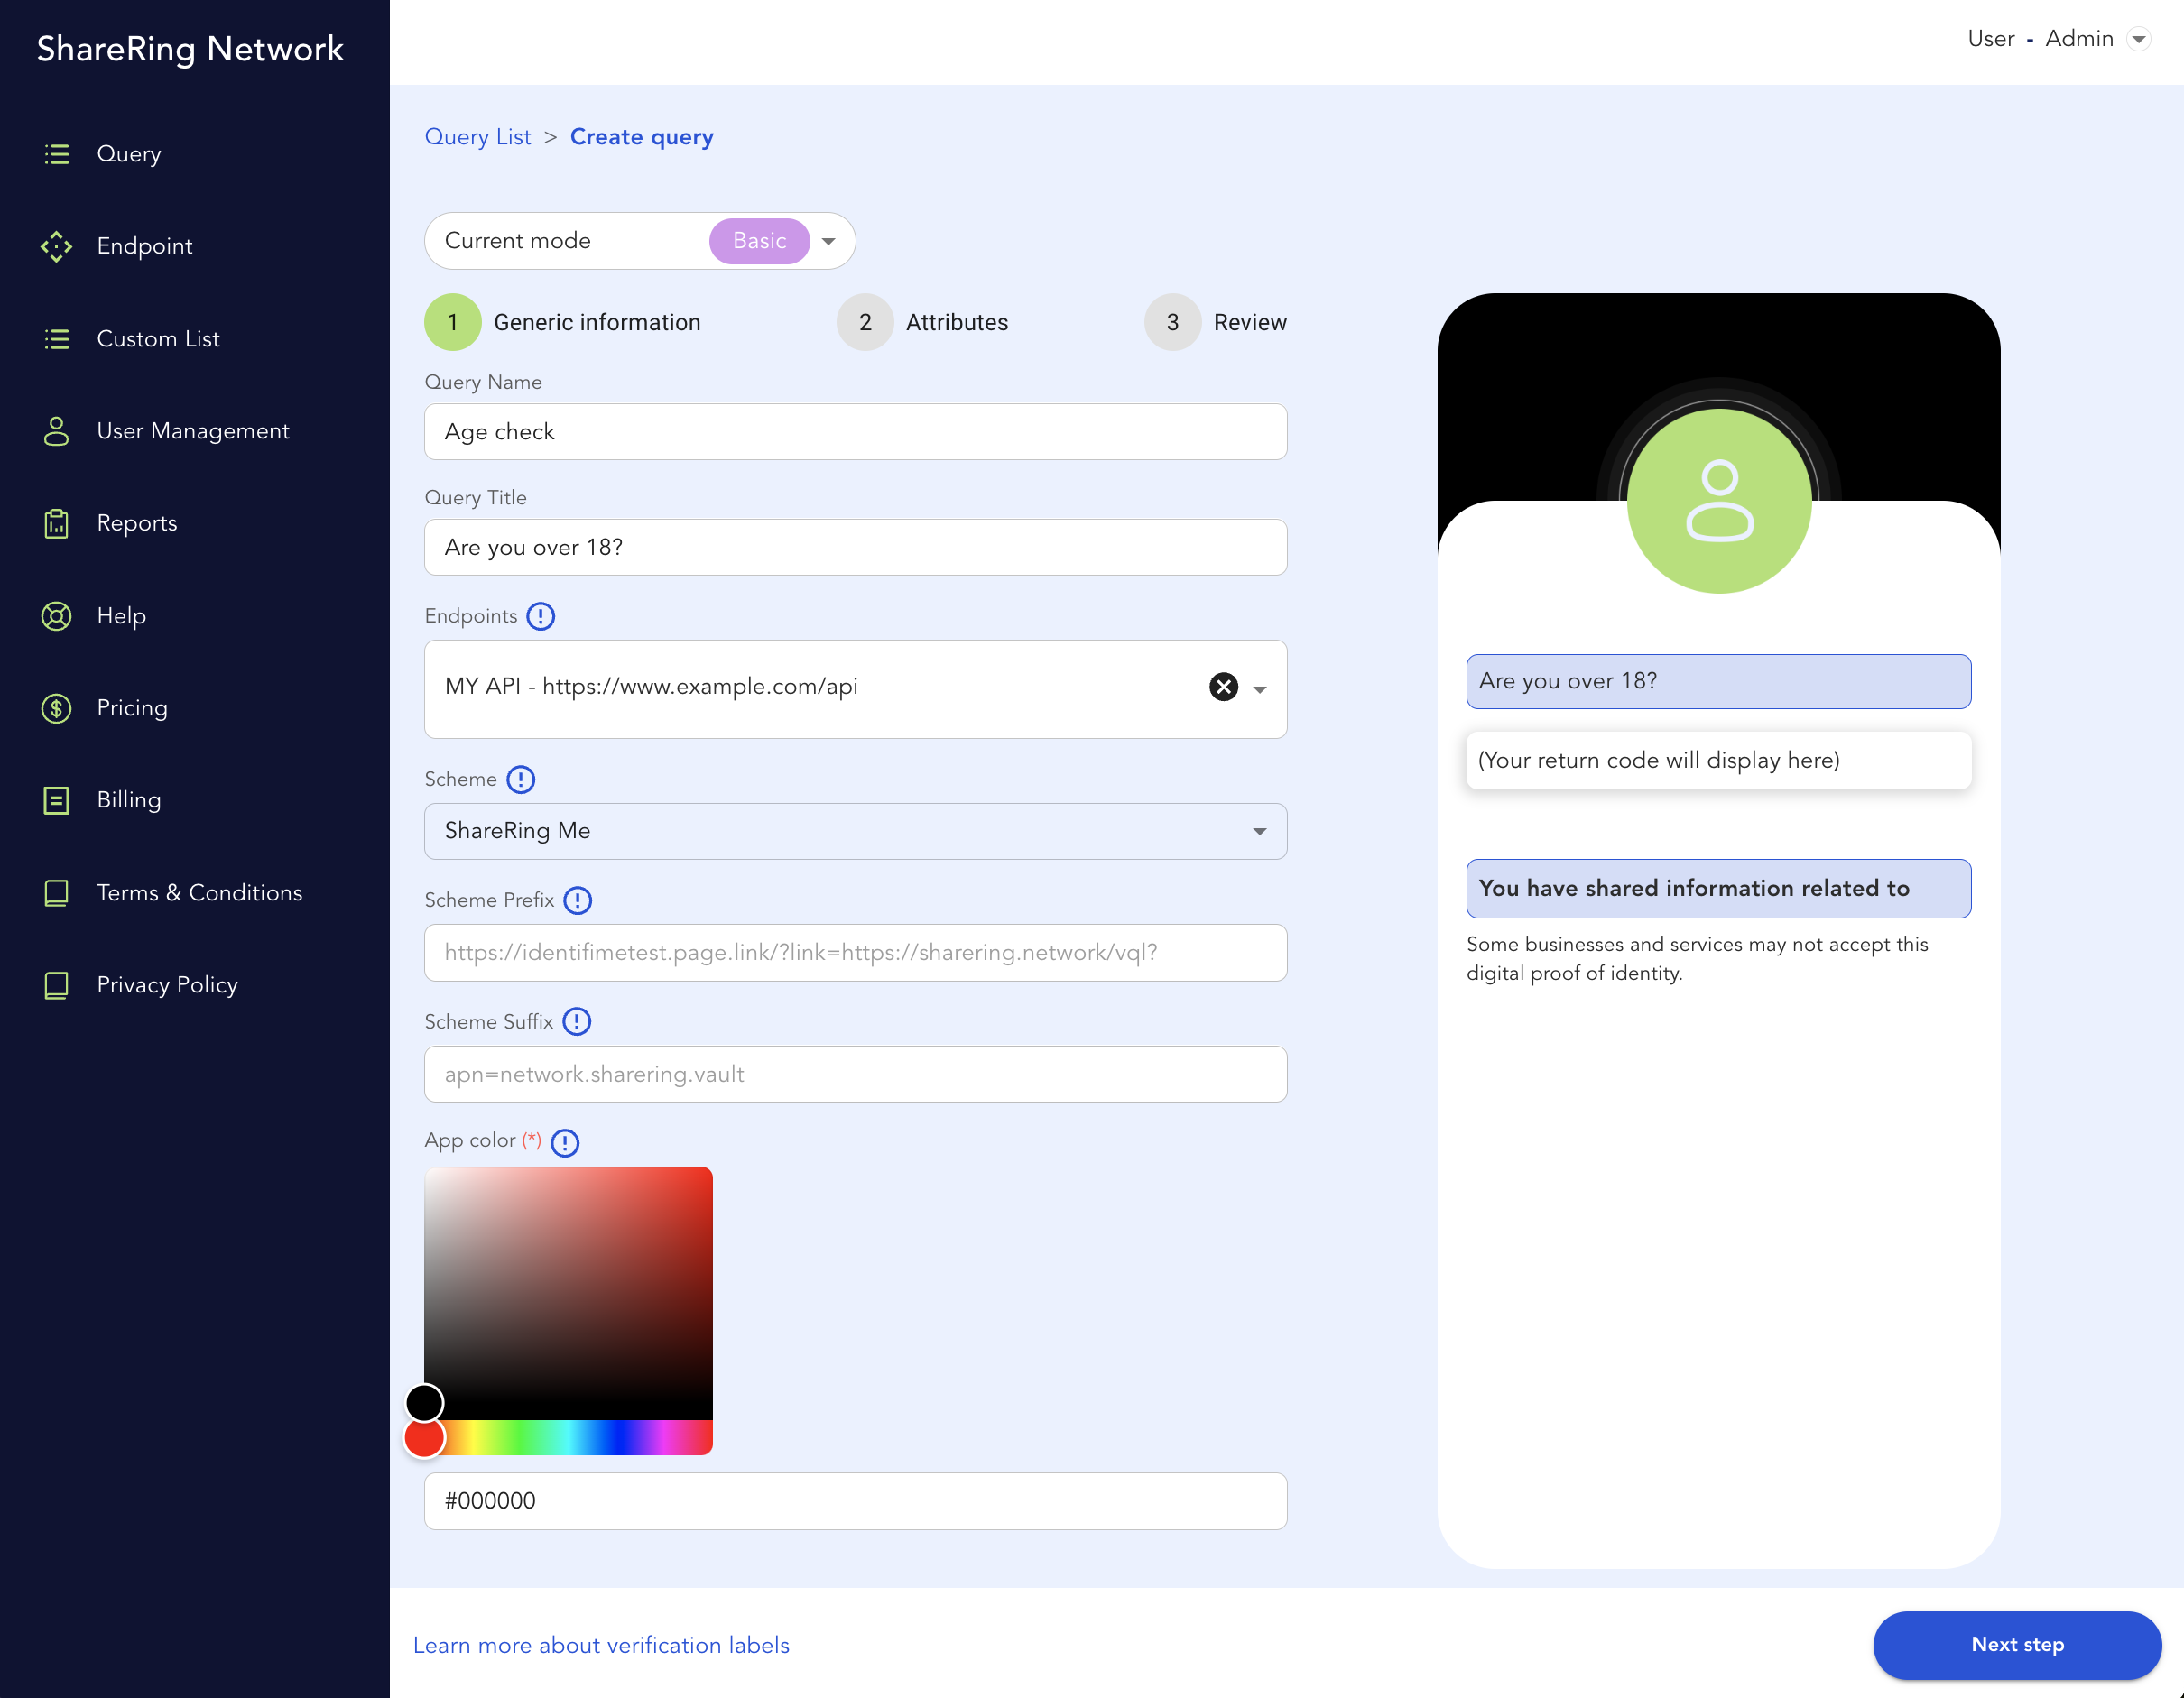
- Click Next step.
- Select the attribute you are querying. For instance, Age.
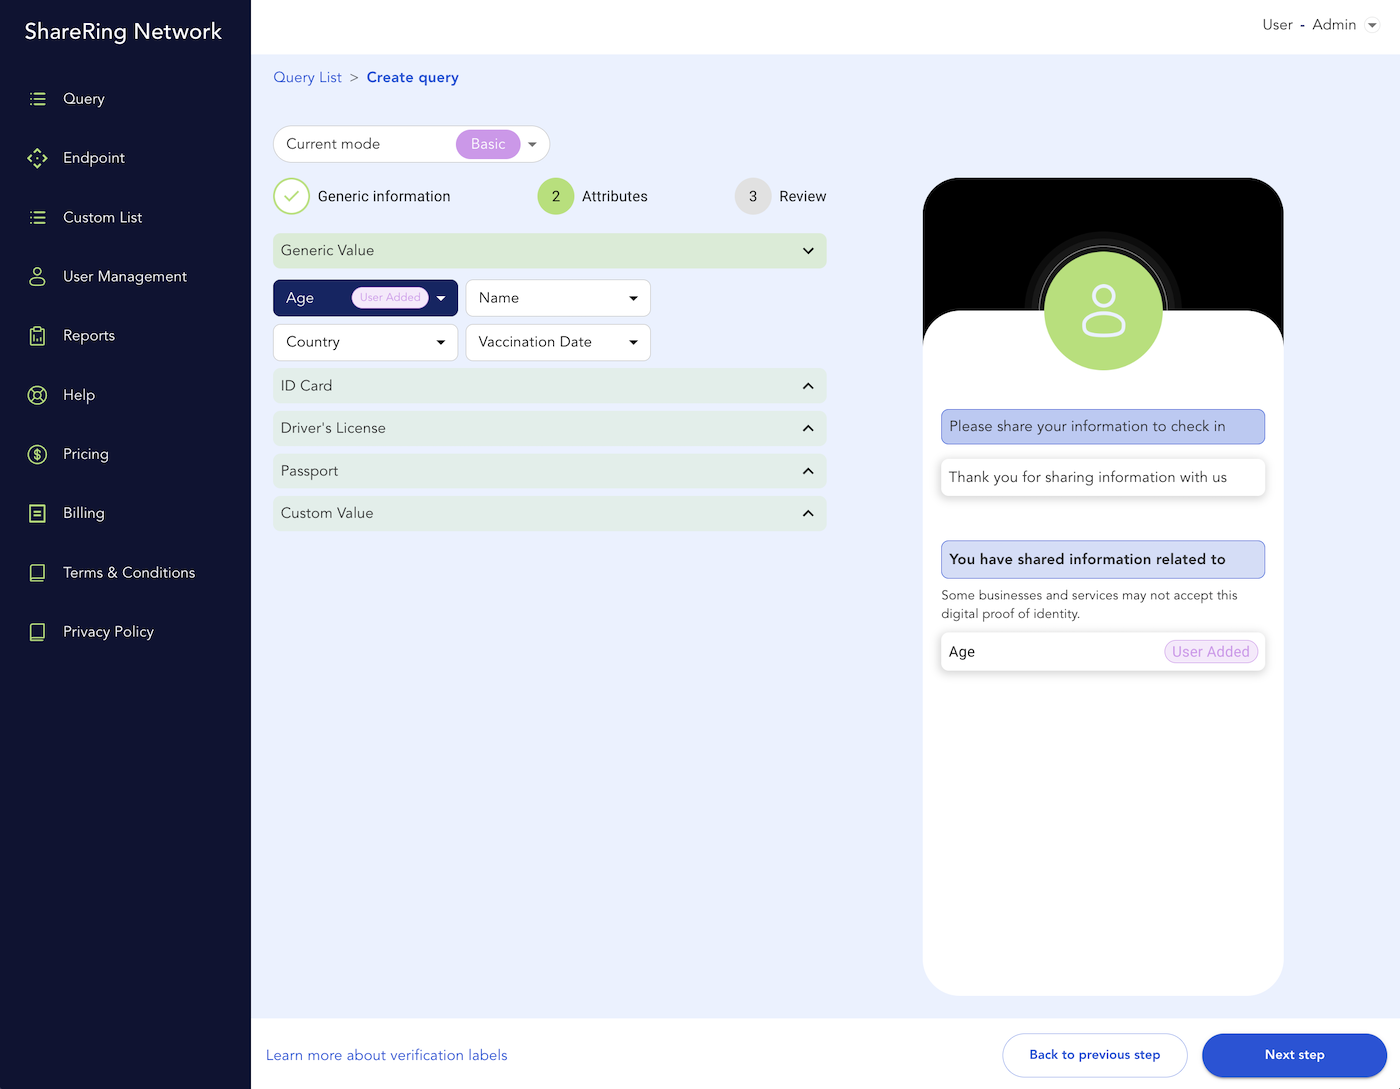
Basic mode queries on a free account can only query user added values that have not been checked or verified by ShareRing. Learn more about verification levels.
- Click Next Step.
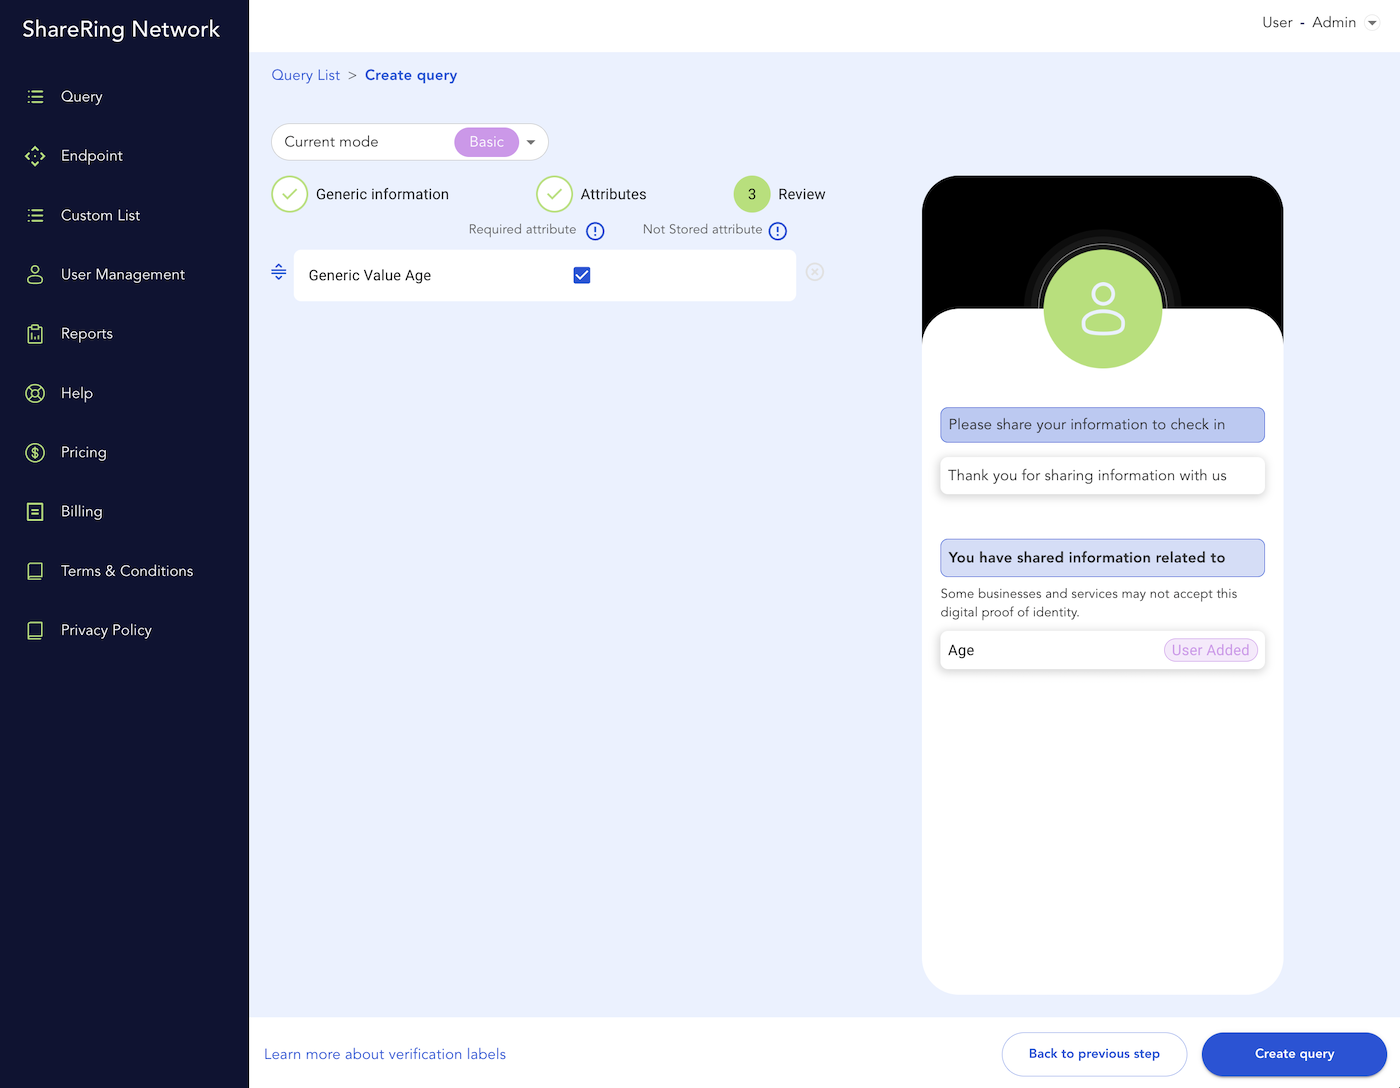
- Make sure the required attribute checkbox is checked so the user must share their age if they approve the request.
- Click Create Query to finish creating the query.
A QR code is generated for each query. Click Actions for the query you just created and select Open Query Code to see a webpage with the embedded code. You can also integrate the QR code into your website. Your customers can scan the QR code to provide the information you have requested. They can review the request and approve or deny sharing their information.
Advanced Mode Query
To create a query in advance mode, click the Create button from the Query page, and select Advanced from the current mode drop-down menu.
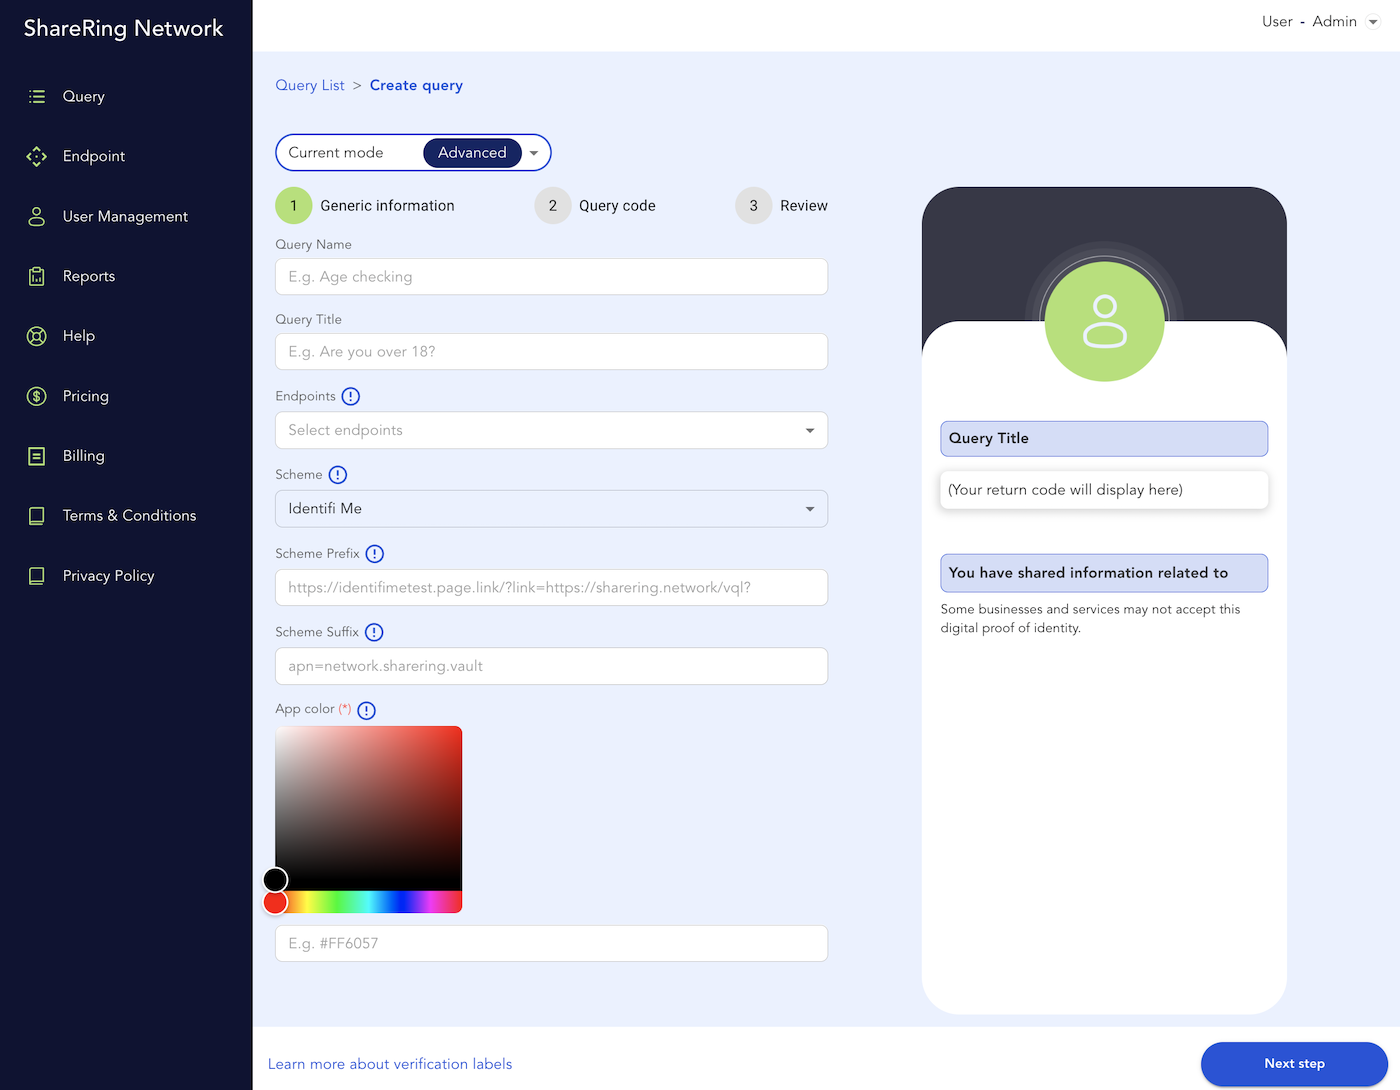
- Query Name: Add a name that you can use to identify this query. For example,
Age check. - Query Title: Enter the query you will ask the customer. For example:
Are you over 18? - Endpoint: Add the endpoint where you want the query results to be sent. See Endpoints to define your endpoint.
- From Scheme, select the default app you want your query to be supported with. Your selection will auto-populate the Scheme Prefix and Scheme Suffix, depending on your selection, which are required to open the correct app when a user scans your QR code.
- Select the color you would like to display in the app when the QR code is scanned.
- Click Next step.
- Enter the JavaScript for your query. For instance, to check somebody is over 18:
var Over_18 = VALUE("age.verified") > 18 ? "Yes" : "No" ;
return "Over 18? " + Over_18;
The keyword "age.verified" in the above code snippet requires the highest verification level for the user's identification. If you want to change the verification level, you can use:
- "age.verified" for the maximum level of verification.
- "age.checked" for the medium level of verification.
- "age" for no verification.
For a complete list of verification levels and associated keywords, see ShareRing Link Verification Levels and Keywords.
- Click Next Step.
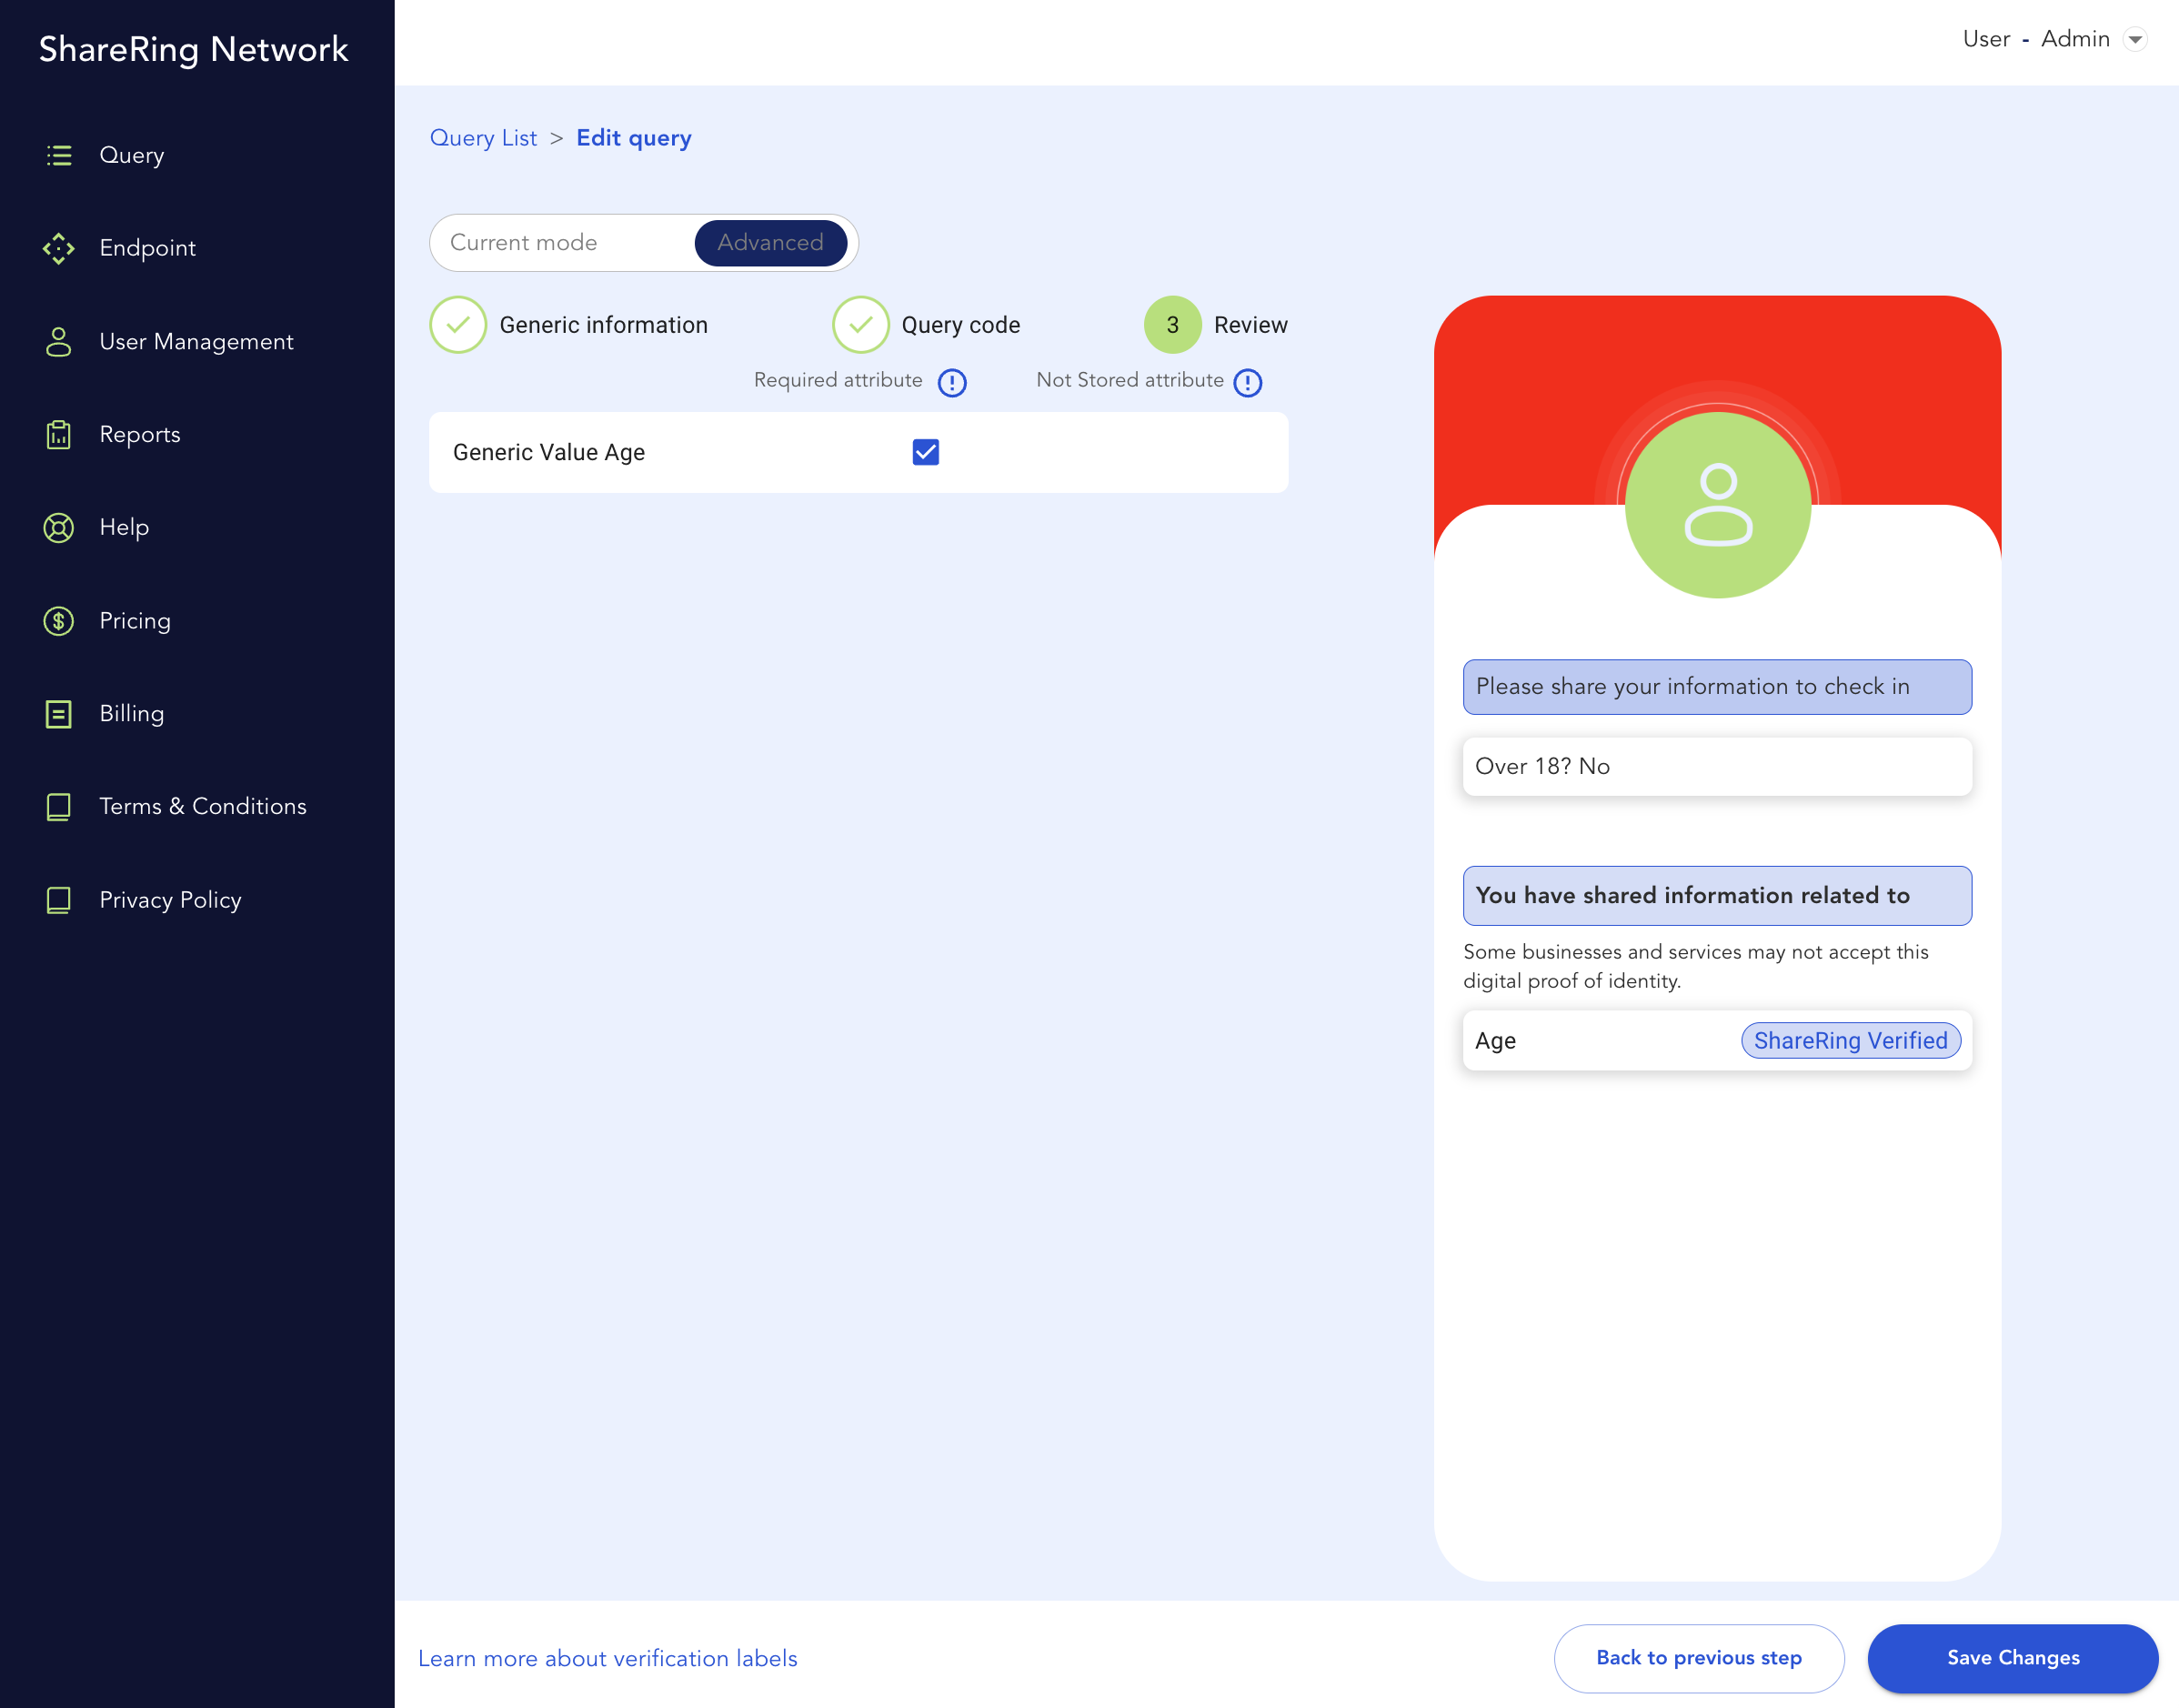
- Make sure the required attribute checkbox is checked so the user must share their age if they approve the request.
- Click Create Query to finish creating the query.
A QR code is generated for each query. Click Actions for the query you just created and select Open Query Code to see a webpage with the embedded code. You can also integrate the QR code into your website. Your customers can scan the QR code to provide the information you have requested. They can review the request and approve or deny sharing their information.
Endpoints
The endpoint tab is where you define the API or email address you'd like the results of your queries to be sent to.
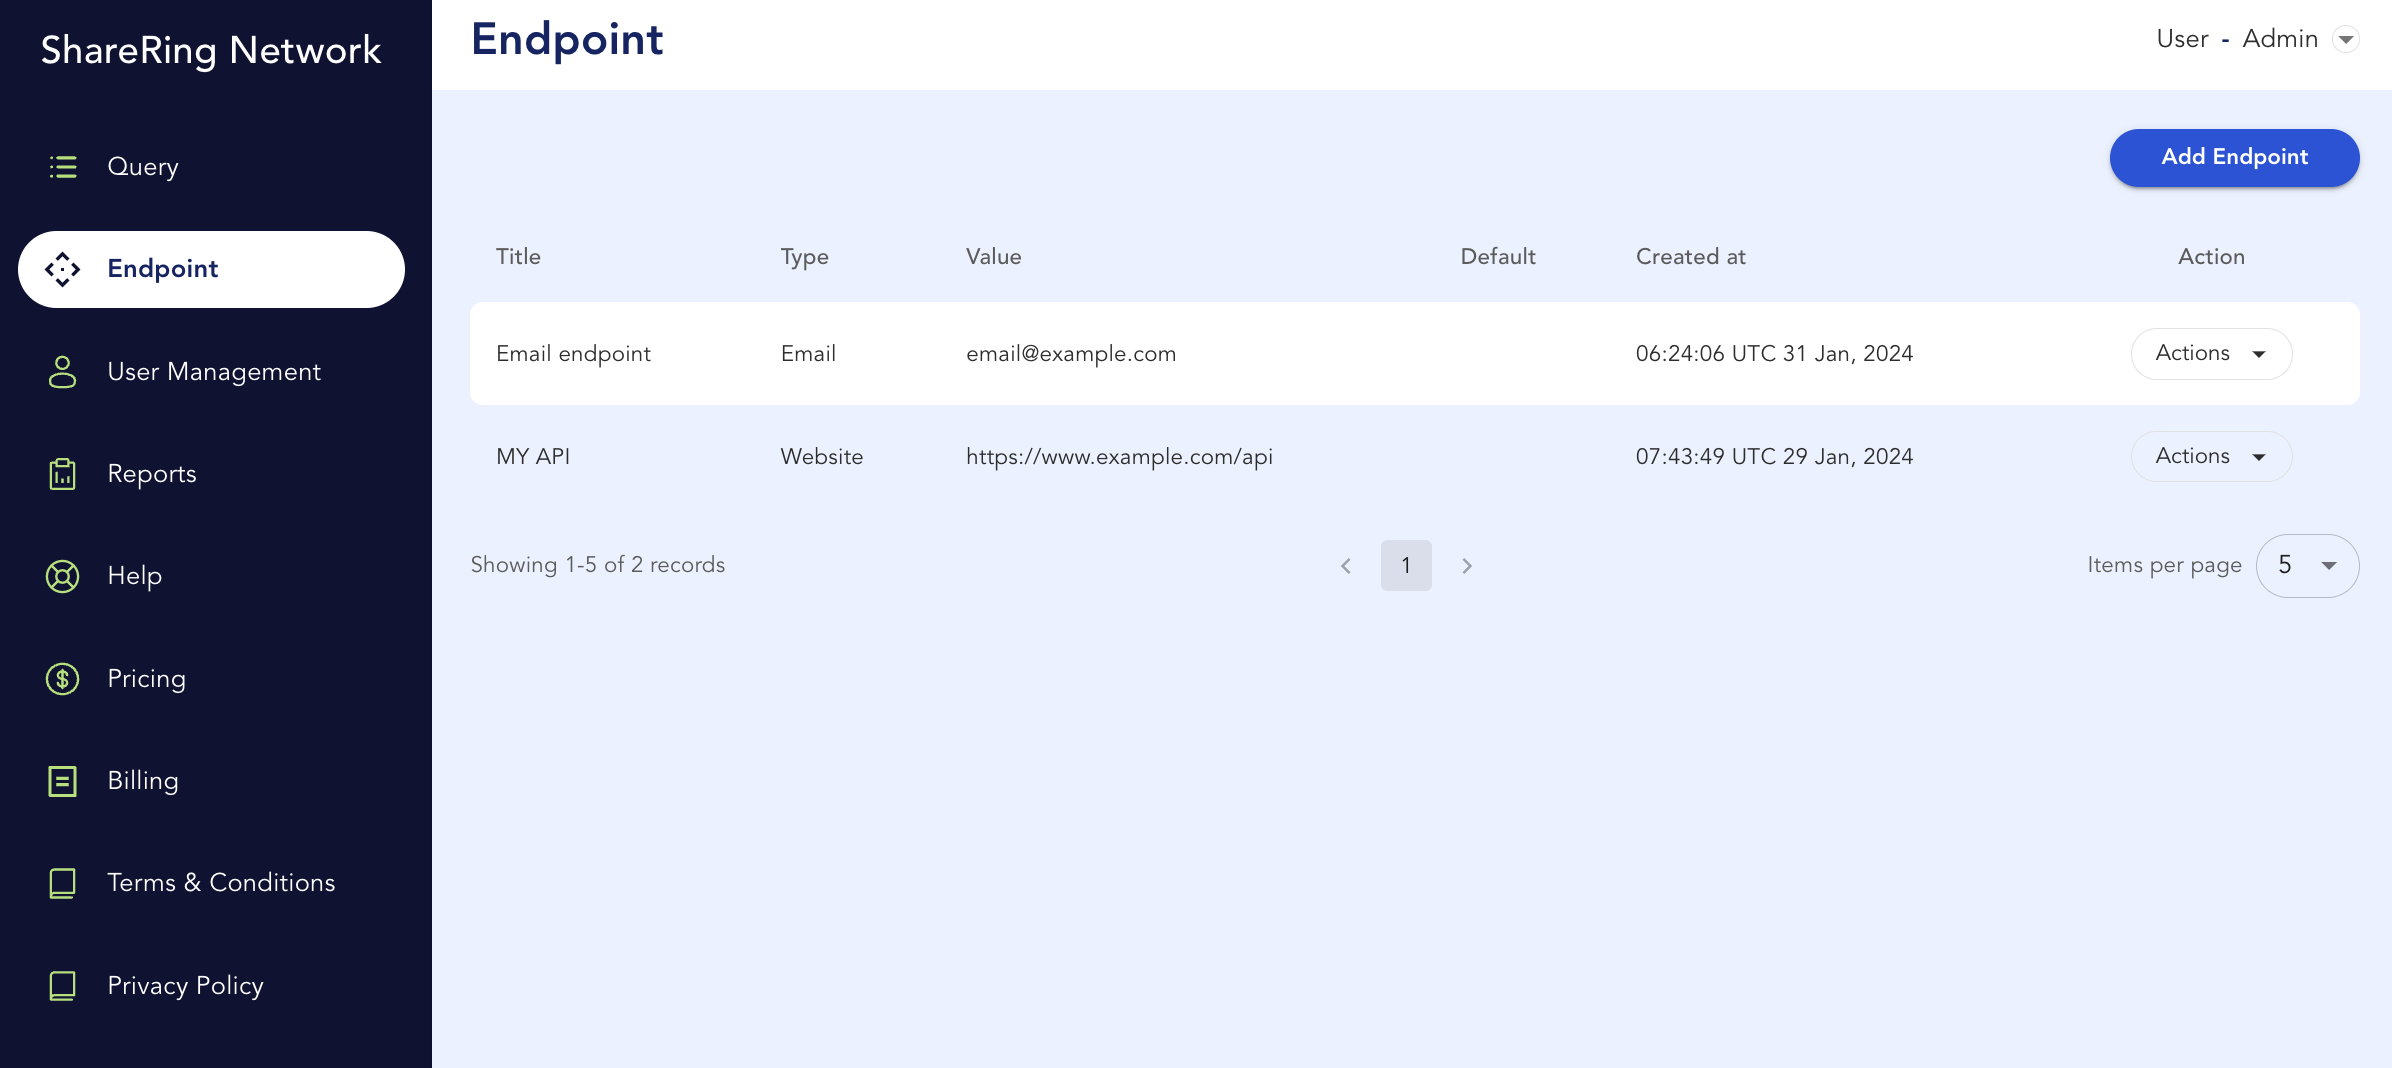
To define a new API endpoint, complete the following steps:
- Click Add Endpoint.
- Give the endpoint a title for easy reference.
- Select the type of endpoint: API Endpoint or Email.
- Enter the URL for the API endpoint or the email address for email.
- Click the checkbox if you would like to make this endpoint the default.
- Click Add.
Your new API endpoint has now been defined and can be selected when you create new queries.
You can use the Actions drop down menu for each endpoint to edit, copy, set as default, or delete the endpoint.
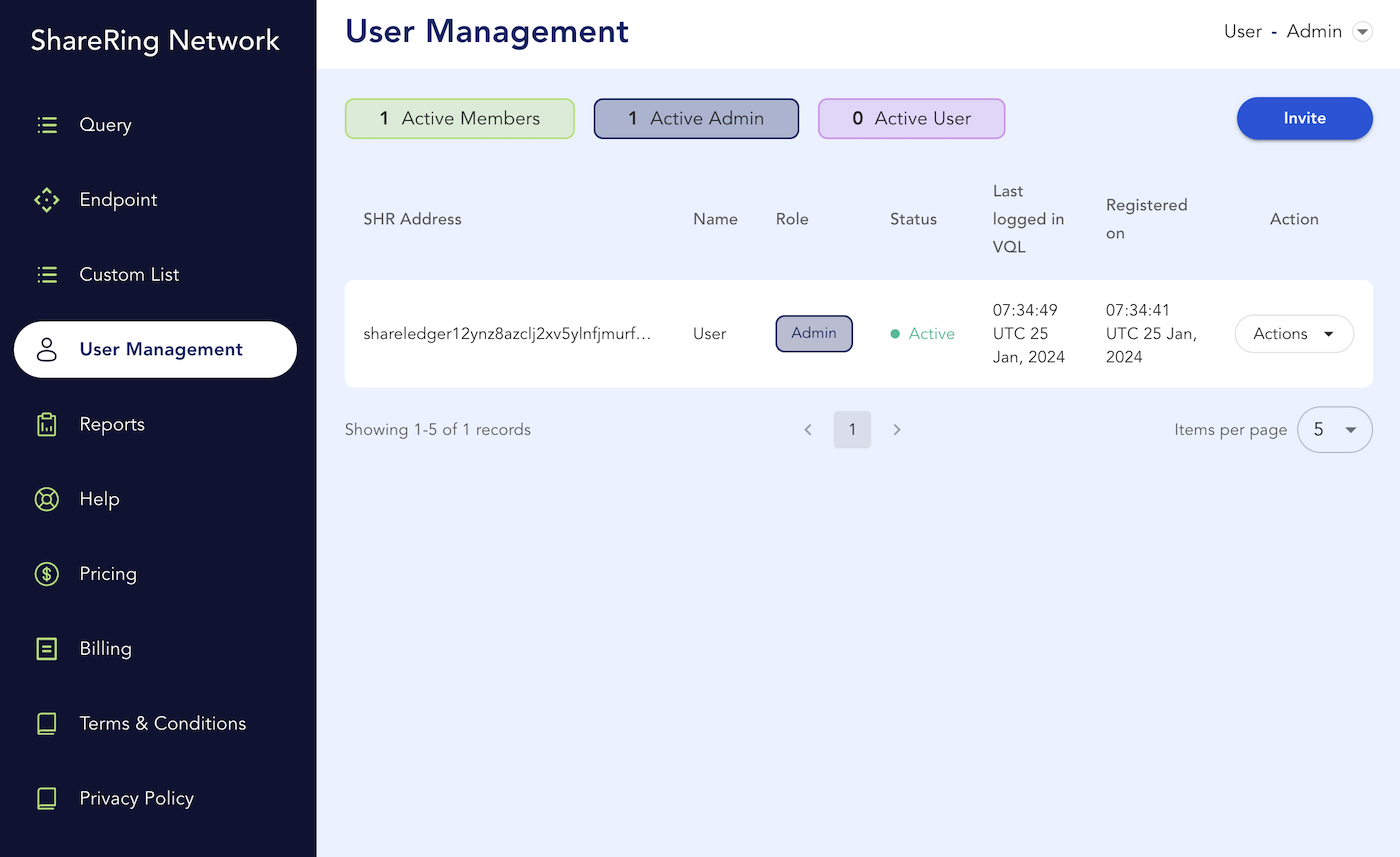
User Management
From the user management screen you can invite other users to your dashboard, edit user information, and assign roles, for instance, Admin or User.
Users with Admin level access can manage and invite other users and access the billing area of the dashboard.
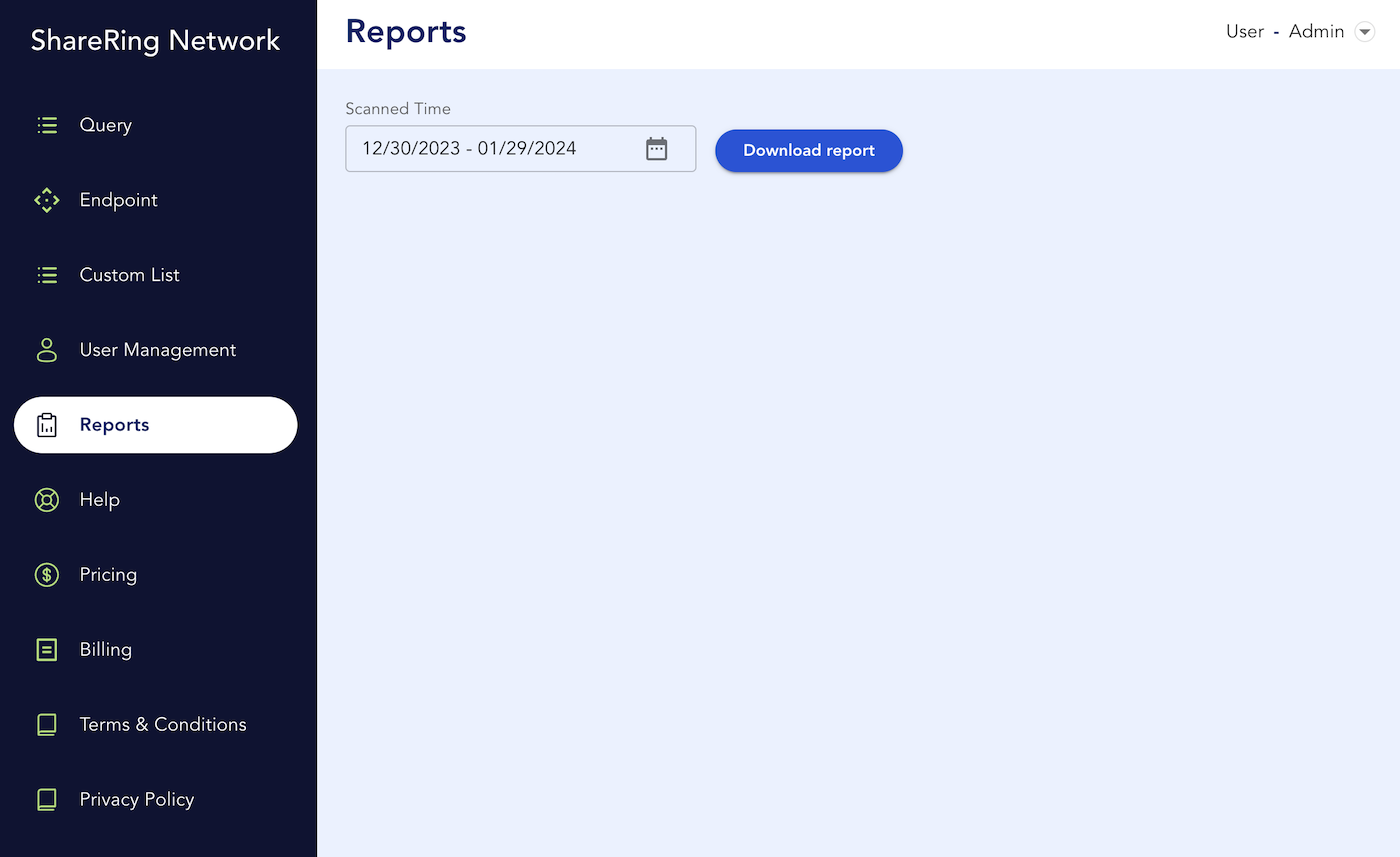
Reports
You can download reports of the queries run and the number of attributes queried from the Reports tab.
The report is delivered as a CSV file that shows the number of ShareRing Checked and ShareRing Verified attributes shared and the total number of users who have scanned QR your codes.
Integrate Your ShareRing Link Queries into Your Website
To integrate your ShareRing Link queries on your website and provide your customers with a seamless experience perform the following steps.
- Copy the code below onto your site:
...
<div class="sharering-query" queryId="<QueryID>" mode="dynamic" qrcodeOwner="<QueryOwner>" app="Identifi Me" oninit="onInit" onscan="onScan">
  <div class="qrcode-content">
      <div id="qrcode"></div>
  </div>
</div>
...
<script src="https://raw.githack.com/ShareRing/shareringlink-javascript-library/master/sharering.query.lib.prod.min.js" crossorigin="anonymous"></script>
<script>
  function onScan(data){
    //do something with the result
  }
  function onInit(data){
    console.log('onInit', data);
  }
</script>
- Replace
<QueryID>with the ID value from the ShareRing Link dashboard for the query you are integrating into your site. - Replace
<QueryOwner>with the Query Owner value from the ShareRing Link dashboard for the query you are integrating into your site.
Example sites
You can see examples of embedded ShareRing Link queries on our demo site at demo.shareri.ng.
For more details, you can also check out the JavaScript library here: https://github.com/ShareRing/shareringlink-javascript-library.